
I have always loved using natural bath products like the ones you would find at Lush, and I have always wanted to have a go at making my own so that I can choose the scents and ingredients that I like. In a previous post on welcoming autumn, I mentioned picking up a new cosy craft and this year I decided to finally give soap making a go.
It can be daunting when planning on having a go at a new craft when looking into the supplies you might need. It would never make sense to spend a small fortune on lots of different materials and tools to then find out that the craft might not be to your liking after all. That’s why finding a reasonably priced starter kit is always a good way to have a little try without feeling that you have broke the bank to do so.
To begin my soap making journey, Dimas bought me the rose soap making kit by Kirstie Allsopp for Hobbycraft.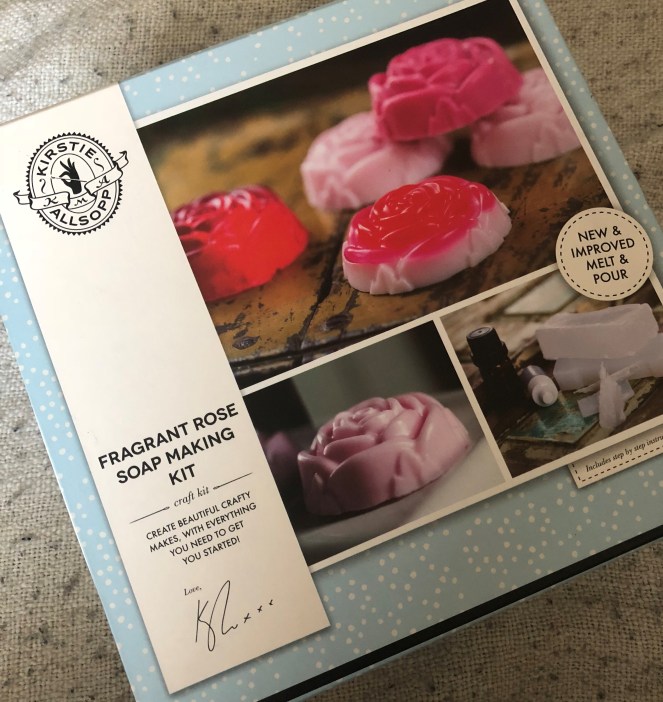
The kit promised to have everything needed to make your own rose scented soaps straight away and for £20, it was a reasonable price for a curious beginner.

Inside, the kit included two 500g melt and pour bases, a powder dye, bottle of rose fragrance and a silicone rose mould plus and instruction booklet. The instructions were easy enough to follow and gave some hints and tips on different ways to mix the two bases (one clear and one white) to make different effects.
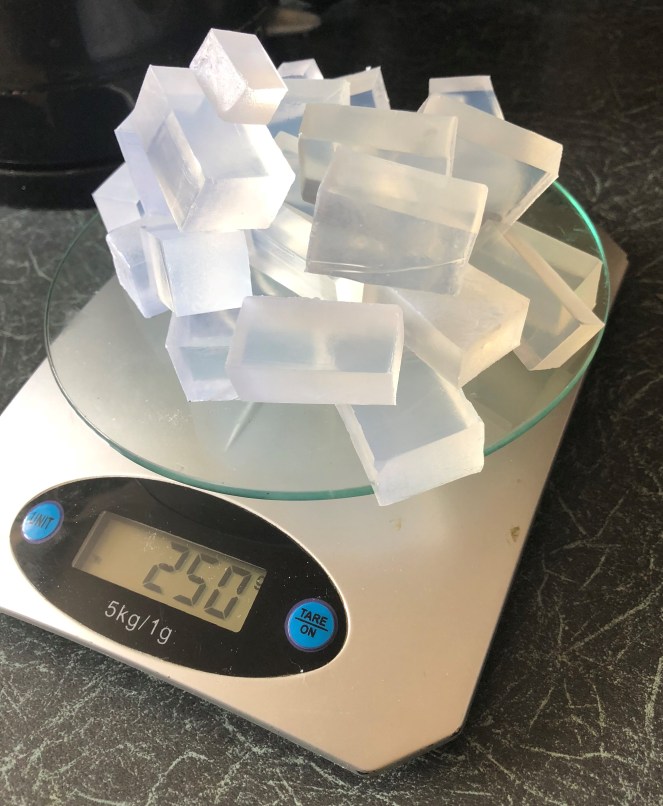
As a test run I decided to use the clear base to make enough for three soaps – one each for my mum, nan and myself .
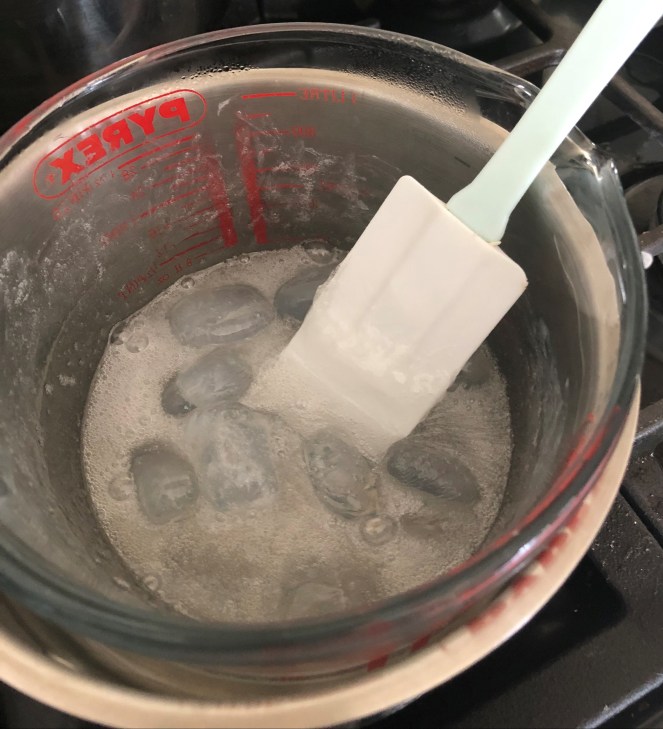
A block of the base is enough to make six soaps at once, so I halved the block to make just the three soaps to start with. The melt and pour method involves heating the base using a bain-marie method or alternatively gently heating it in the microwave in short bursts at a time. Definitely avoid burning the base as it will really affect the smell and finish of your soaps.
I personally prefer to use the bain-marie for melting as I feel you can keep an eye on the base to make sure that all the lumps are gently melted away before adding any dye and fragrance.
Following the instructions I added a little of the powder dye, mixing carefully to avoid lumps as much as possible and then the recommended drops of fragrance.
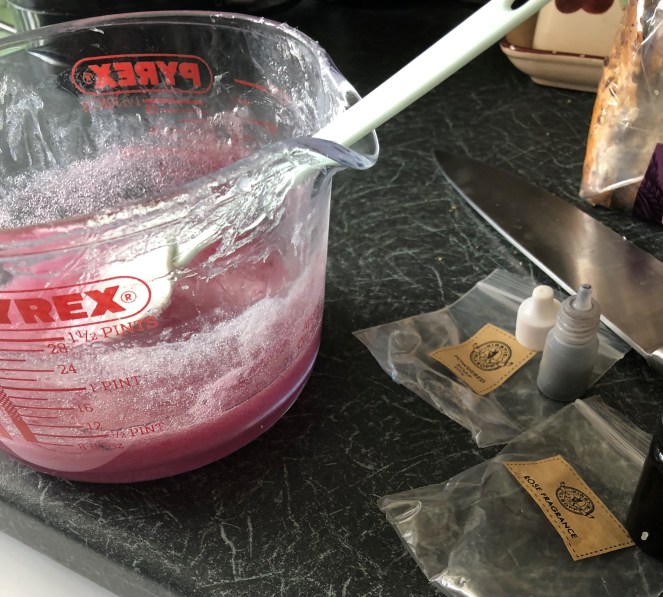
The pink colour of the melted base really reminded me of the pink slime from Ghostbusters 2 and The Blob! You can add as much or as little of the dye as you like to create either a pastel or deep, almost red, shade of pink. The fragrance made me think of Turkish Delight which smelled gorgeous.
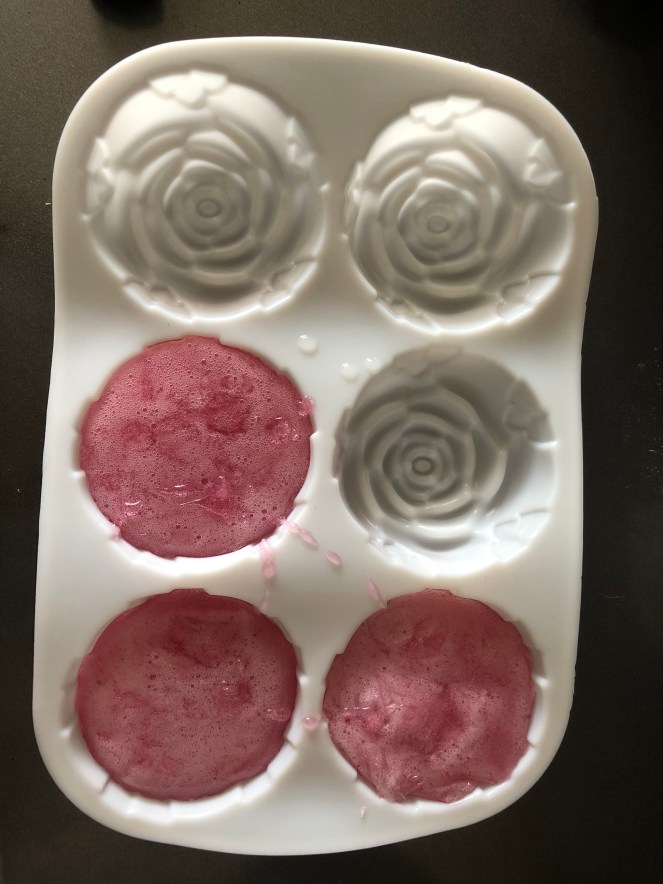
Once you have your colour and intensity of your fragrance right, pour the melted base into the mould. I placed my mould on a baking tray to keep them laying flat while the soaps cool. It is also important to pour the liquid in all at once as going back to add a little more if you have any excess will result in lumps like the bottom right soap. The soaps start to cool very quickly and adding more after you’ve first poured will leave you without a smooth surface.
Leave the soaps to cool for at least a couple of hours, though I would say overnight to be 100% sure that they have fully set and they can then be turned out easily.

I was over the moon with how my first ever hand made soaps turned out! The rose shape was well defined and they still had that Turkish Delight smell. I was pleasantly surprised at how easy it was to make them. Easy enough to be a quick but satisfying craft with plenty of ways to customise to your own tastes.
One thing that often puts me off with supermarket bought soaps is how dry and tight my skin feels after using them and I was genuinely worried these would be the same. But I am pleased to say that they were really gentle and not drying at all, even after using in my daily shower for a whole week and my nan found the same. One thing I would have changed though would have been to add more of the oil than recommended to make the scent longer lasting after washing. The soap smells delicious while showering but the smell doesn’t linger on the skin long enough afterwards.
If you are thinking of having a go at making your own soaps and before committing to buying lots of different bases, moulds and fragrances – I would fully recommend picking up this kit first if you can.
Nic x
