
Recently I have really wanted to take up dressmaking, both to make some unique vintage style clothes for myself and to also hopefully be able to update my wardrobe while saving money.
I have some sewing experience, mainly making cushions using my sewing machine or making small toys for my mum’s school. As much as I love the idea of making my own clothes, it is still quite daunting. Last week I cut out a pattern and made a muslin for a dress from Gertie’s Ultimate Dress Book. I’m hoping that when I get around to putting together the final dress that it will be fairly easy so that I wont lose my confidence!
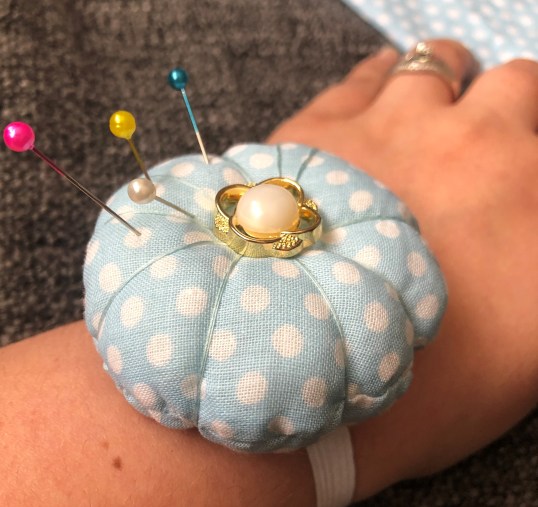
This weekend however, I decided to make something that will come in handy for when I do tackle the dress…when I feel brave enough! I have a habit of putting my pins down after removing them from the fabric for them to then fall on the floor or get buried under other bits of fabric. Now, I don’t much fancy getting a dress pin stuck in my foot one day so I decided to make a pin cushion that goes on the wrist with some elastic. I had seen a few of these over on Pinterest so I thought I would have a go at making one myself.
Using a fat quarter of pretty fabric that I bought at Hobbycraft and a vintage button from a set I had found at a boot sale last year, the pin cushion came together fairly quickly; making it a perfect Sunday afternoon project.

If you would like to make one yourself, you will need the following:
- Fabric (enough for two circles of the desired cushion diameter with a 1cm seam allowance).
- Tracing paper.
- A bracelet or bangle in the diameter desired for the cushion.
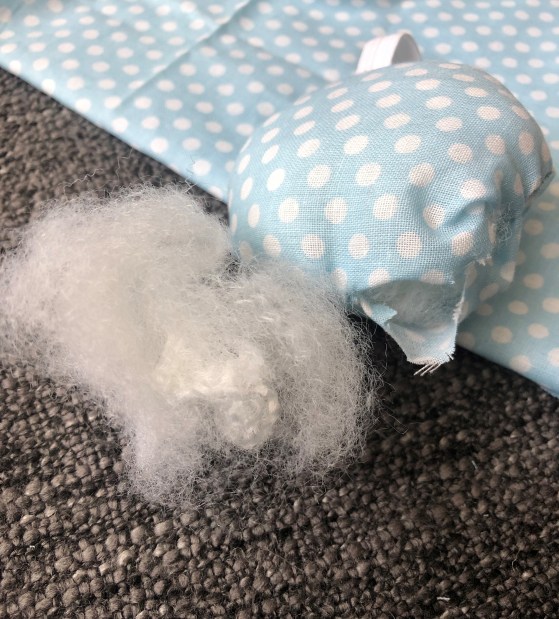
- Polyester craft filling suitable for toys or cushions.
- Thread in the same colour as the fabric.
- 15cm of elastic (more or less depending on the size of your wrist but not so it sits loose).
- A button.
- Scissors and pins.
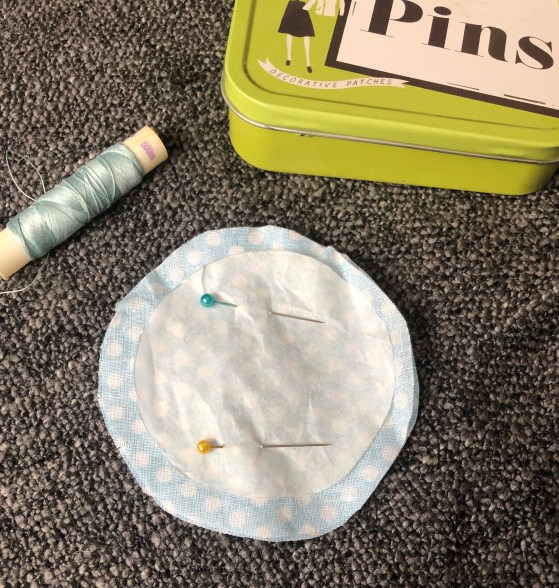
If using tracing paper, trace around the bangle and then cut out the circle.
Folding the fabric in half with right side of the fabric facing inwards, pin the circle of tracing paper to the fabric and cut around leaving 1cm around the edge of the paper.
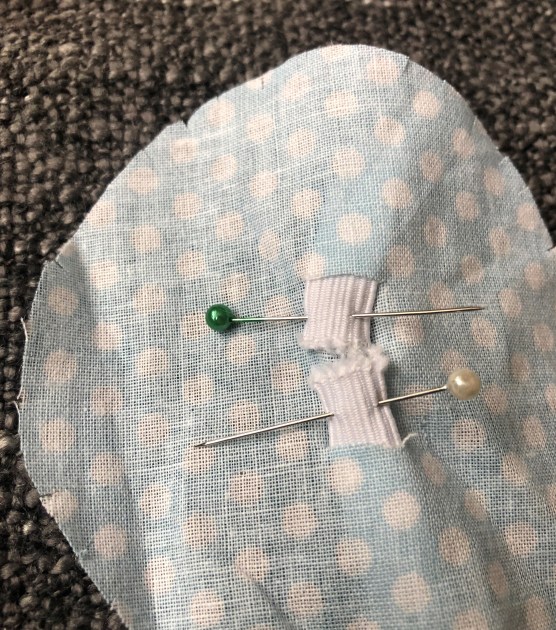
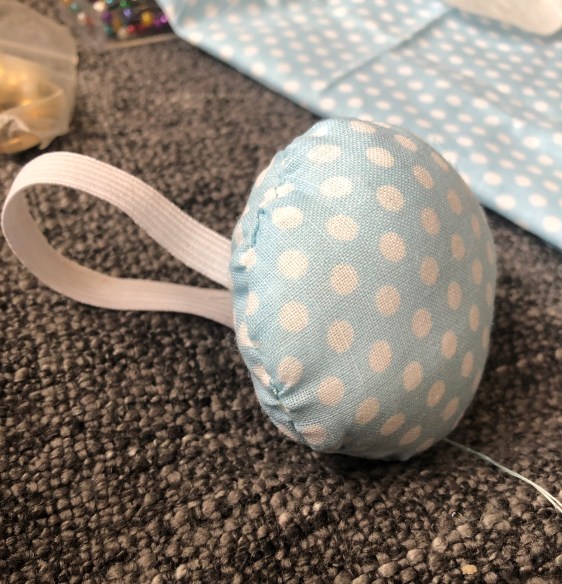
Taking one of the circles, fold it in half and make two snips 2cm apart. These will be the holes through which the ends of the elastic will be fed through. On the wrong side of the fabric, secure the ends of the elastic with a few basic stitches.
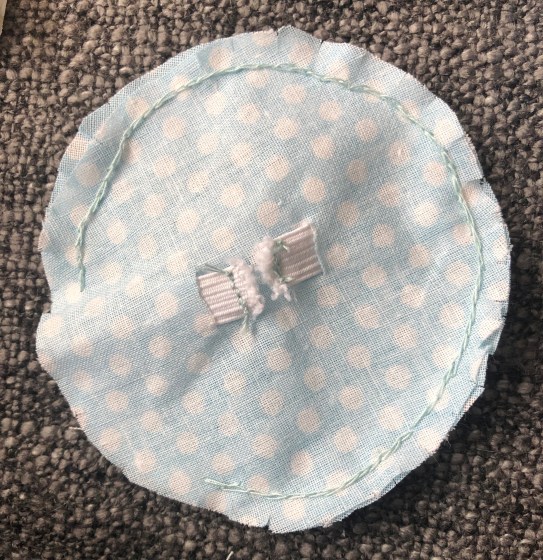
Pin the two fabric circles together with the right side and the elastic bad facing inwards. Snip small cuts around the edges of the circles and then sew them together along the seam allowance. Leave a 2cm gap and turn the cushion inside out.
Stuff the cushion with the polyester filling until it is full and sturdy but still a little squishy. Close the gap using a ladder stitch.
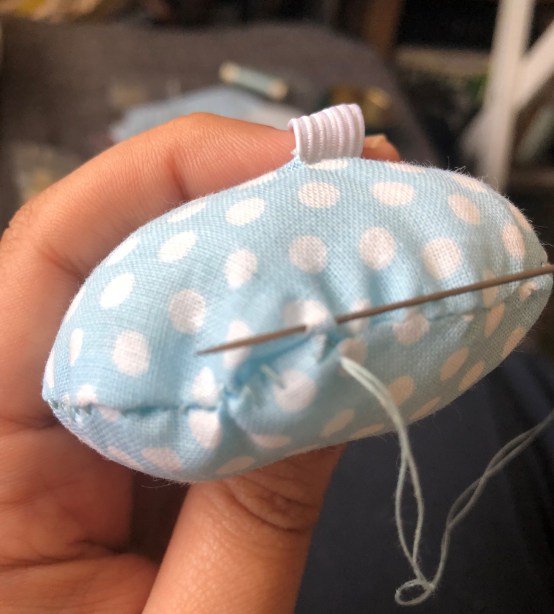
Sew the button into the middle of the cushion, pulling taught enough to indent the button. For my cushion I wanted to give it a flower effect, which I did by sewing thread through the middle of the cushion and through to the back. Then loop the thread around the edge and again through the middle under the button, pulling just taught enough to create a quilted effect.
You could add any extra detailing or embellishments that you might like and make your cushion completely personal to you.

I hope you liked this little sewing project tutorial. Please let me know in the comments if you did or you would like to see more!
Nic x
